Albert Einstein
Albert Einstein was a German physicist. He was born on March 14, 1879 in Wurrtemberg, Germany. After graduating school, he taught at Berlin, Zurich, and Prague. In 1921, he won the Nobel Prize for physics. In 1933, he, moved to America and worked at the Institute for Advanced Science in Princeton. While working in Berlin, Albert Einstein researched and published papers on his theories of relativity.


Theory of Relativity
The theory of relativity involves two theories by Albert Einstein. They are the Theory of Special Relativity and the Theory of General Relativity. While studying these theories, he decided that space and time were not separate. They were one entity, which he called spacetime.
Special Relativity
Special Relativity deals with rest and motion. It questions whether rest and motion are relative or absolute. It also deals with the structure of spacetime. This theory was based on two postulates:
The laws of physics are invariant in all inertial systems.
The speed of light in a vacuum is the same for all observers, regardless of the motion of the light source
Based on the second postulate, Einstein explained concepts like time dilation, length contraction, and time travel.
Time Dilation
The equation for speed is speed=distance/time. Since the speed of light is the same for all observers, that means that if distance increases, time must decrease, and vise versa. For example, if a light is being reflected between two mirrors, the light will be moving at the speed of light. If there are two more mirrors, the same distance apart, the light between them would also be moving at the speed of light. The the second set of mirrors were moving, the light would still be going at the same speed, but it would be travelling a greater distance. For the amount of time to remain the same, time must slow down for the second set of mirrors. This is called time dilation.
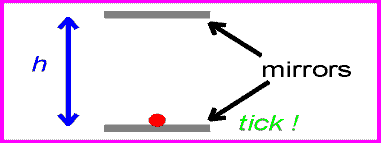 |
| first set of mirrors |
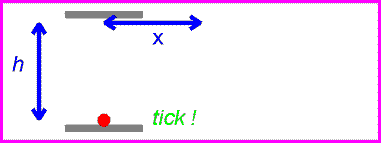 |
| second set of mirrors |
Length Contraction
Using the previous example of the two sets of mirrors, length contraction can be explained. Time does not dilate enough for the second set of mirrors to make them travel at the same speed. Instead length contraction occurs. The length between the two mirrors will contract to make up for the extra distance. Einstein concluded that time dilation and length contraction work together to keep the speed of time the same for the two sets of mirrors.

Time Travel
Time slows down as objects approach the speed of light. Therefore, time stops for objects travelling at the speed of light and for an object travelling faster than the speed of light, time must go backwards. However this has never happened before because objects travelling that fast would gain mass instead of speed and it would take an infinite amount of energy for this to occur. Therefore, time travel is impossible (for now).
General Relativity
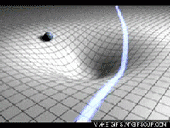
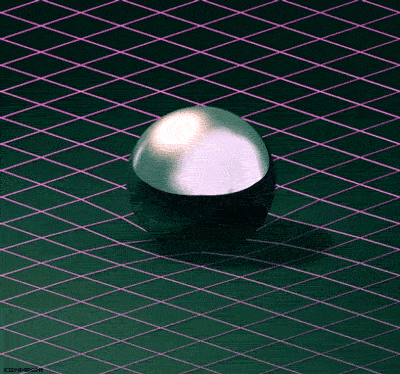
The Theory of Special Relativity deals with objects travelling at constant speeds. The Theory of General Relativity deals with acceleration in the form of gravity and its relationship to spacetime. Einstein described spacetime as almost like a fabric. The fabric of spacetime warped and curved around objects. An example that illustrates this is a trampoline. If a bowling ball is rolled onto a trampoline, the trampoline fabric will curve around the bowling ball. If more balls are rolled onto the trampoline, they will roll towards the bowling ball in the center. This is how Einstein explained gravitational attraction. He described it as the curvature of spacetime.
Principle of Equivalence
The Principle of Equivalence was part of the Theory of General Relativity. Einstein observed that the gravitational force experienced on Earth is equivalent to the acceleration force experience in space. It is shown with this equation: inertial mass*acceleration = intensity of gravitational field*gravitational mass.
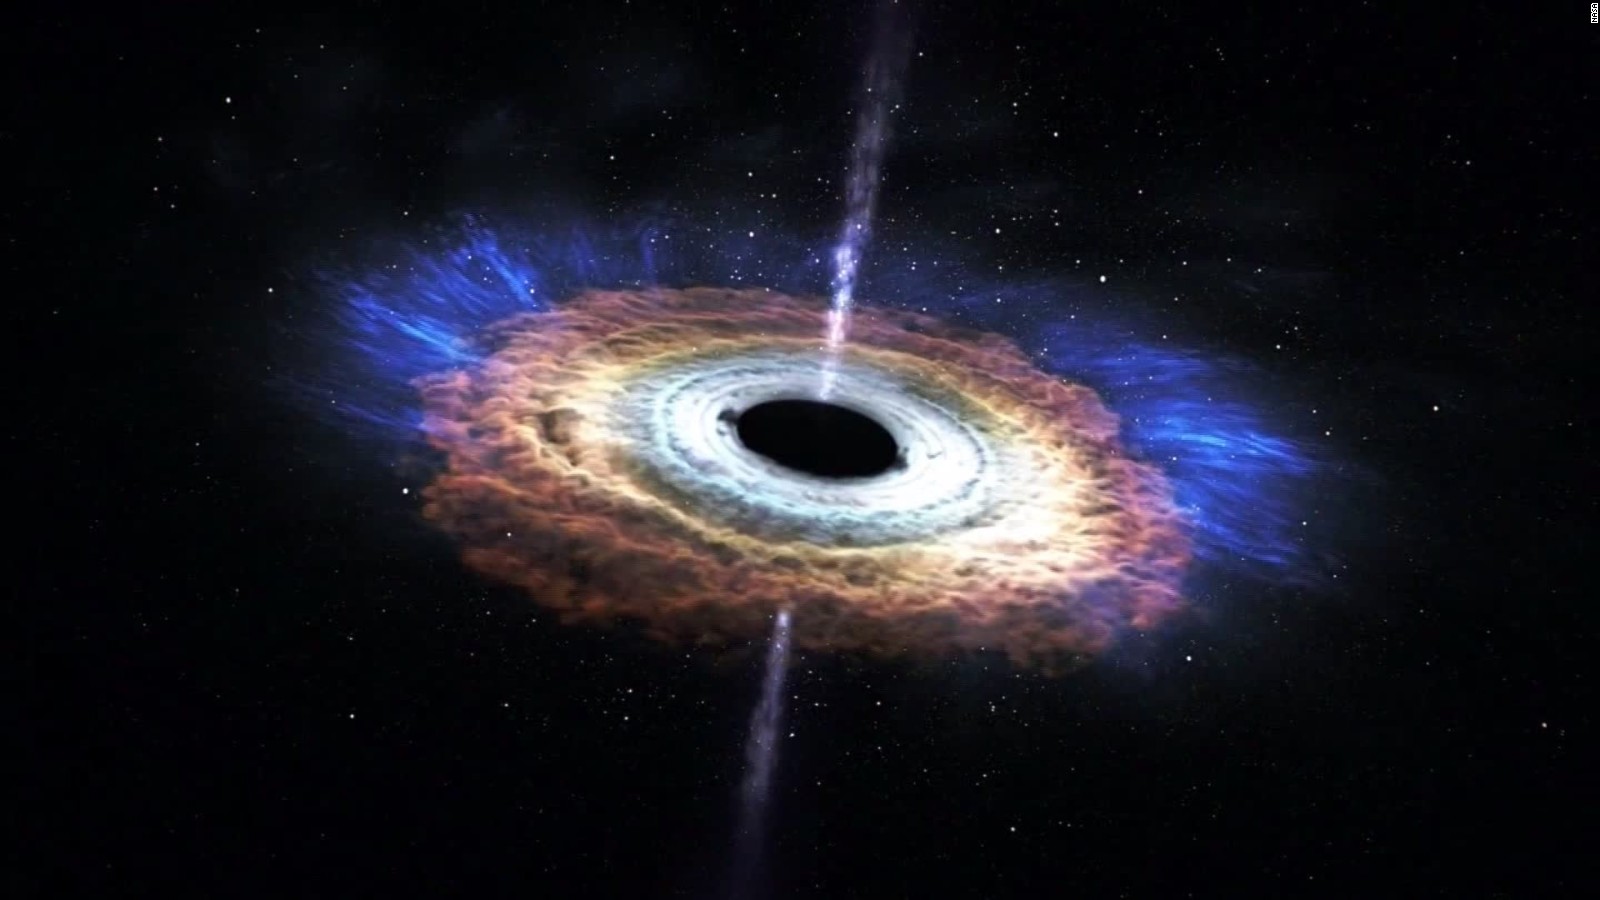
Black Holes
General Relativity implies the existence of black holes. Black holes are regions of space where spacetime is completely distorted, due to an object’s gravitational force being so strong, so that nothing, not even light, can escape. Black Holes are probably formed when massive stars collapse on themselves. They grow by absorbing the mass around them.
Wormholes
A wormhole is a structure that connects two points in spacetime, like a portal. They could connect two places relatively close or billions of light years away. Since it connects two points in spacetime, it could hypothetically connect two points in time. The General Theory of Relativity suggests that these exist, but scientists have never discovered any.


More Stuff
 #savage